Hello everyone – it’s another happy Monday!!
First of all, I wanted to say a sincere and heartfelt thanks to all of you who have supported me on this crazy rollercoaster ride that is Gallery Idol 2012! I would *never* have got this far without you so I thank you all from the bottom of my heart for your support, votes, and just plain putting up with me! lol!
I hope you’re ready for some more, as we’re kicking off with Round 3!!
So the challenge for Round 3 was to use one product and create a masculine and a feminine card with it. What a great challenge!!I’m actually not one of those who dreads masculine cards, in fact I quite enjoy making them! But using one product to create cards that are masculine and feminine, that’s something I’ve not done before!!
I started off by jotting down a huge list of ideas again and doing a couple of sketches. Just narrowing down which product to use was hard enough!!
I resisted with all my might using my go-to set for masculine cards (WPlus9’s So 80s). I wanted something that was more of a challenge. Something I hadn’t done before, and probably hasn’t been done by many others either …
I wanted to create a masculine card using a floral set.
Not just any floral set, oh no.
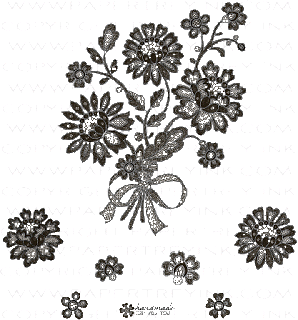
An ultra-feminine floral set. Lace Bouquet by Papertrey Ink:
I know. I don’t make life easy for myself, do I?! Luckily for me I had a great idea for how to use it!!
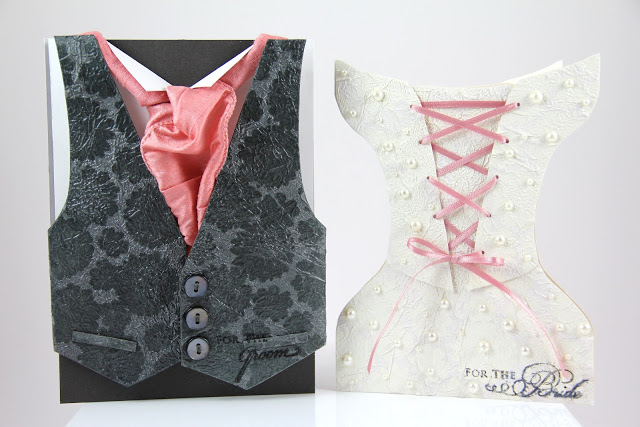
And out of that idea the following was born …
What do you think? I am so in love with these cards and how they turned out!!
There’s a lot of detail that went into these works of heart, so please bear with me.
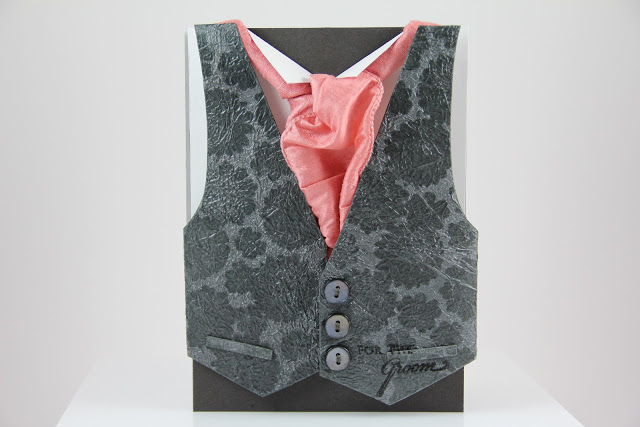
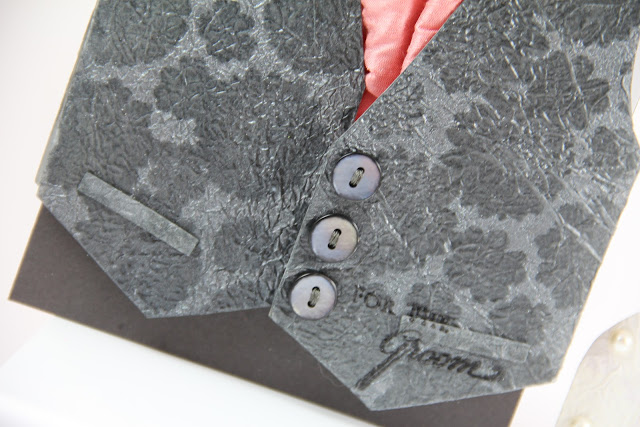
I started with the masculine card first. I took a sheet of Soft Stone cardstock and used my Smokey Shadow inkpad (old formula) to darken it, using an direct-to-paper technique. I then wanted to create a fabric-like texture so settled on using the Faux Silk Technique. For those of you that aren’t familiar with it, it’s very simple.
I took some spare white tissue paper, scrunched it up repeatedly, then glued it to the cardstock, smoothing some of the wrinkles but leaving the majority. For some added emphasis I also swiped my Smokey Shadow inkpad over some of the creases too.
I then spritzed all over with Graphite Glimmer Mist and used my heat tool to dry it more quickly.
Now we come to creating that wonderful pattern. I used 4 of the individual flowers from Lace Bouquet to repeatedly stamp a pattern using Versamark ink. When I’d covered the entire sheet I then embossed using WOW! Clear Semi Dull Embossing Powder. This powder gives a clear finish that is somewhere between gloss and matt – perfect!! Once I’d embossed the sheet I spritzed with more Glimmer Mist and dried again using my heat tool.
Now I had my brocade/silk-like pattern, all ready to turn into a waistcoat!
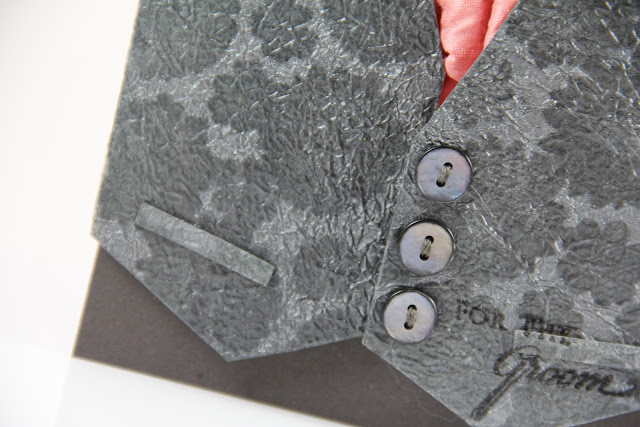
I decided on my card size (5″x7″) then sketched a pattern by hand that would meet the size requirements on scrap paper. I then trimmed out the two pieces and used some adhesive tape to adhere to the reverse of my cardstock, then cut them out with scissors. I cut the two main pieces and the two little rectangles that represent pockets. I adhered these in place with Pinflair Glue Gel.
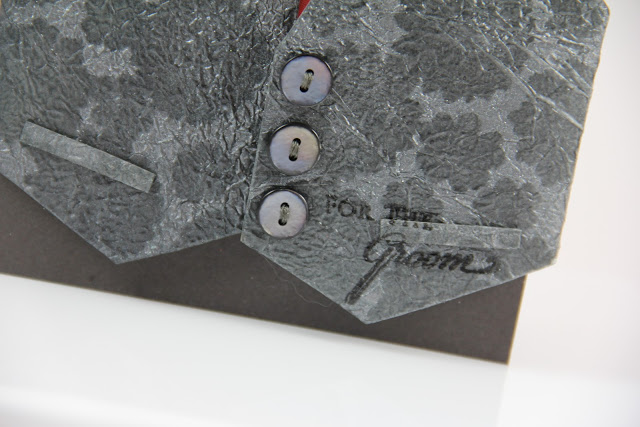
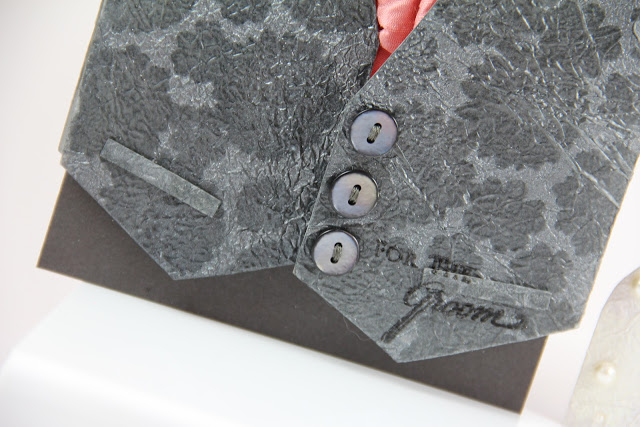
Then I could get to work adding some fun detail! I stamped the sentiment from WaltzingMouse’s Big Day Additions set, selectively inking the words in the sentiment so I could make my own and choose the positioning of the ‘For The’ to be somewhere else. I stamped these in Versafine Onyx Black. I then dug out some of my True Black buttons and found some that were more on the grey side and also all identical to each other. I pierced some holes in one of the waistcoat panels and stitched the buttons in place using DMC Floss.
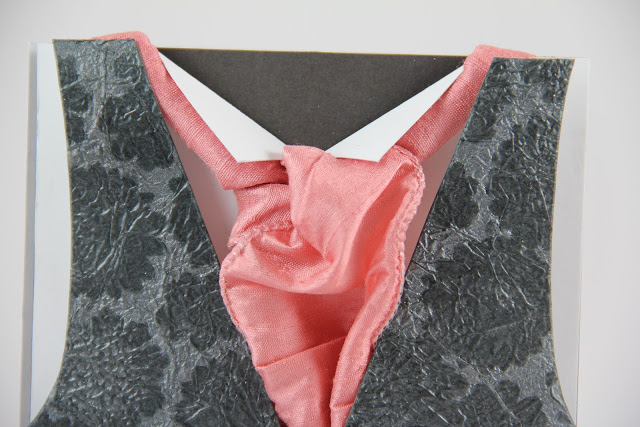
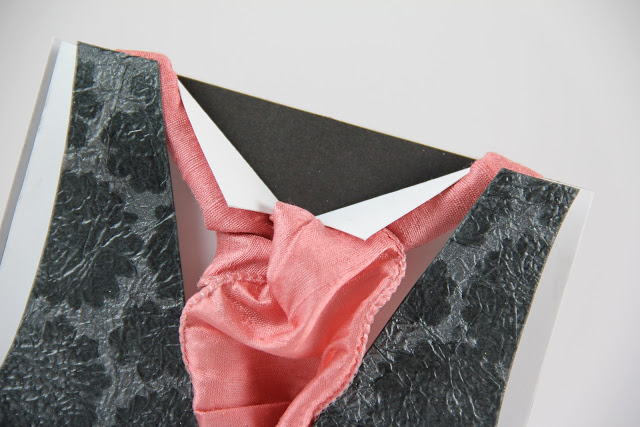
I created my card base from Smokey Shadow cardstock. I then cut a panel of Stamper’s Select White cardstock and cut a slit in the top centre. I folded down two triangular tabs – these would form the shirt collar wings!
I bought some wide, raw-silk like ribbon to form a cravat. I Googled how to tie a cravat (lol) then set about recreating that in ribbon! I think the results look very true to life!!
I adhered the ribbon loosely in place to the white panel using a couple of pieces of ScorTape, then adhered the white panel to the card base using the same. I then finally assembled my waistcoat panels, using Pinflair to adhere with lots of dimension off the base.
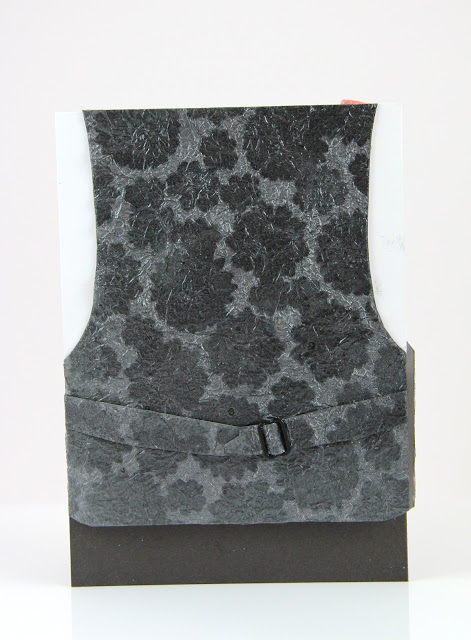
And, seeing as I had some of that pretty pattern left over, I did a back panel for the reverse of the card too:
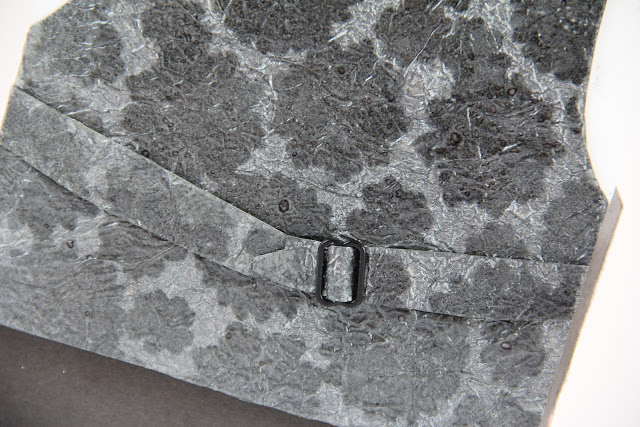
I even added some final bits of cardstock to form the ‘ties’ at the back of the waistcoat. And that little buckle-type thing? That was ‘liberated’ from one of my detachable suspender straps! You can’t say I don’t make sacrifices for my work!!
And that’s my masculine card done! Whew!!
Now onto the Bride card:
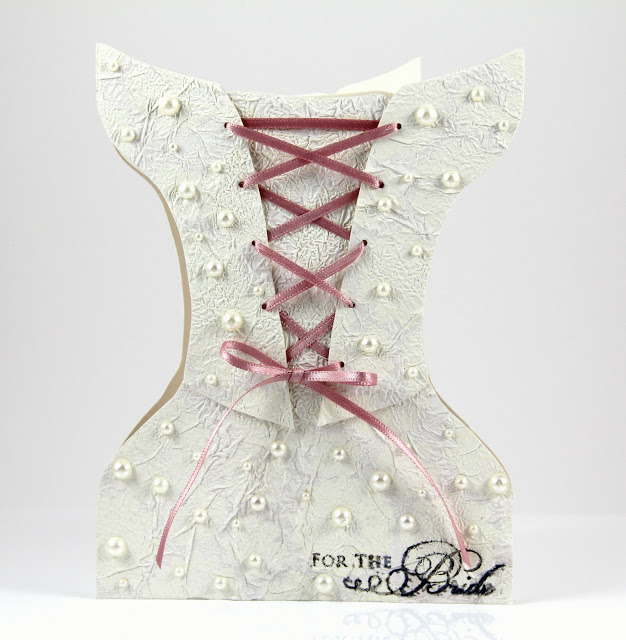
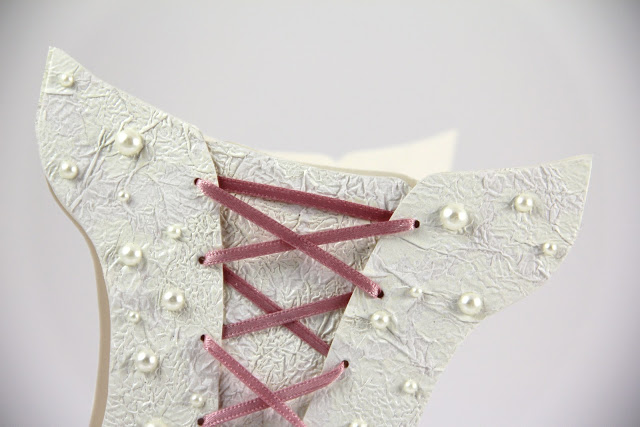
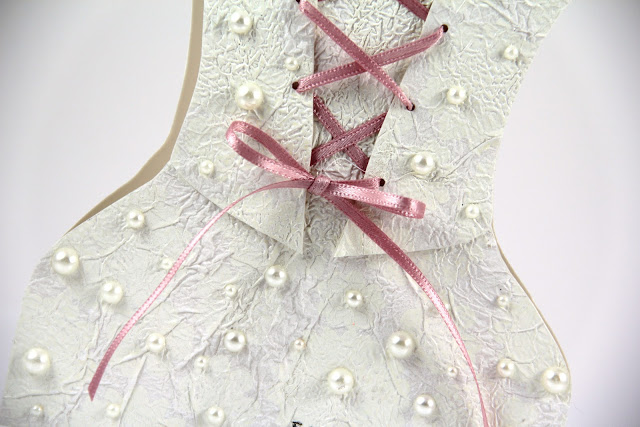
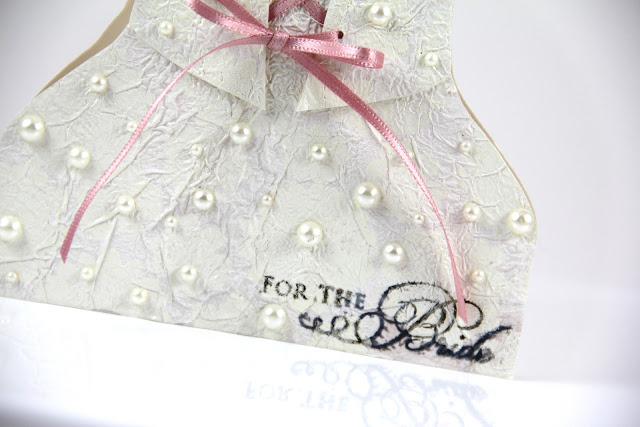
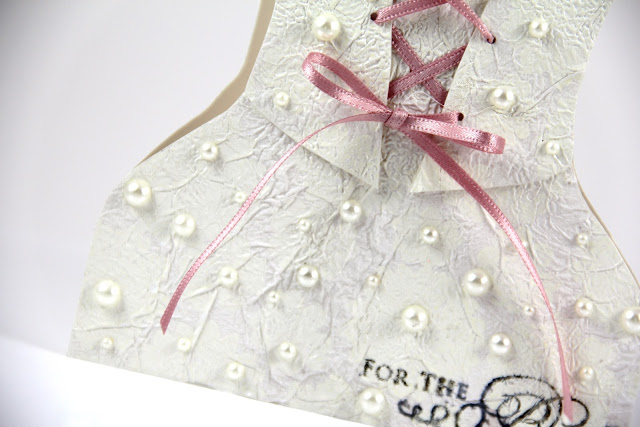
I used the same technique to create the ‘fabric’ for this card, using Vintage Cream cardstock as a base, embossing with WOW! Opaque Vanilla White embossing powder, and spritzing with Studio Calico Mister Huey’s in Calico White, adding a touch of Old Lace Glimmer Mist too.
I again sketched and cut out a template by hand. I cut three pieces – the main dress body and two panels. I then punched holes in the two panels and threaded some ribbon (in a similar colour to the waistcoat’s cravat) to ‘lace’ it up as a corset. I adhered the panels to the main body with ScorTape before tightening the ribbon and tying it in a bow.
I added a scattering of KaiserCraft Pearls (actually finished off a packet!) and stamped the sentiment with Smokey Shadow ink (new formula). An annoying little bit of ink bleed, but nevermind.
For the card base I used Vintage Cream cardstock and again started with a 5″x7″ base, but this time created a shaped card, trimming by hand using my earlier template. I adhered the dress body to the base with Pinflair and that was my bride card done!!
Total time making these cards? 7 hours. 7 hours!!! 5 of them for the masculine one alone!! I definitely put in a ton of effort to create these beauties!! But totally worth it though!!
I really hope you’ve enjoyed taking a look through the detail involved in bringing these two projects to life. I hope it’s also inspired you to look to your own collection of supplies and see them being beyond just ‘masculine’ or ‘feminine’. There’s definitely a way to turn pretty much most design elements into something suiting either gender!!
Voting for this round of Gallery Idol is now open!! To get yourself to the voting page just follow this link. The remaining 14 other contestants have certainly raised the bar yet again so I know you’ll have a hard time choosing a favourite!! I do hope what you’ve seen here will have swayed you to cast a vote in my favour, and I would truly appreciate that more than I can express. Thank you please. :o)
Voting is only open until Thursday so don’t delay!!
I’d love to know what you think of these creations. Thanks so much for stopping by – I do hope to be seeing you again soon!! :o)


Incredible! I was so amazed I had to show my non-crafty husband who thought they were amazing! It was a seven hours well spent!
T, these cards are truly amazing! I had family that said when they were voting, that your cards were awesome! I love the faux silk technique and it turned out beautifully! So glad to be in this with ya!
You've really created 2 unique cards. Wow, the black 'fabric' vest is amazing and really does look like a high end designer outfit! I love all the pearl beads on the 'dress' – it makes such a statement. Good luck with the next round of Gallery Idol.
P.S. Thanks for your response to my question on a previous post. I'm still thinking of a project that I can make with fabric and stamping!!
In one word: MAGNIFICENT.
You have outdone yourself, Taheerah! Best. Cards. Ever. 🙂
Incredible and lifelike!
So pretty….It's fun competing with you!
I'm just floored at the amazing beauty of these cards, Taheerah! 🙂 Gorgeous in every sense of the word! 🙂
Wow, these are amazing! Thanks for sharing how you made them.
These are cards?! I just can't believe it…they are SO detailed. I especially love the ribbon on the masculine card…it looks so cool the way you used it! And to take such a feminine set and create something that a guy would wear…you are doing so awesome, Taheerah! Good luck this round 🙂
Congratulations Taheerah on all your recent wonderful achievements in the crafting world. All your hard work and attention to detail is paying off. Will keep an eye out for the magazine.
Just love these two cards. Stunning. Great photos too !
Absolutely stunning! The perfect His 'n Hers cards!
Wow, Miss T. These cards are so lovely. And I just love the back of the guy card.
Impressive! Love all the details.
The close up pictures show all the details, Taheerah–wow! I love the tissue paper and I love how you used a floral set on both!
Congratulations on making it so far. Your cards are unique and utterly gorgeous. I love them both, and would like an outfit just lie them for me and my DH! Good luck moving forward.
These are totally worth a HOT KRISPY KREME DONUT ~ I would say maybe a half dozen LOL BEAUTIFUL T!!!
i love it, they are both so beautiful!
OBVIOUSLY, I believe you had a GREAT idea here 😉 No really, your cards are super and totally fabulous!
Blown away, Taheerah!!! These are amazing! I love the texture you achieved on them, they are so realistic! And I'm so impressed you cut these shapes by hand!!
Wow, T! You did an amazing job! They turned out just gorgeous and so true to life! I love how you used Lace Bouquet for this challenge! I think it will pay off for you! Best of luck…
you worked hard for yo cards! hee hee. Great job!
Wowza! No detail was spared here!! Your cards are just stunning Taheerah! Worth every minute:)
So much fun being able to play alongside of you!
These are beautiful! I love all of the texture!
Great cards Taheerah! Love the texture you got on the cardstock! A great set!