Hey everyone, and thanks for stopping by!
Can you believe it’s that time again already?! Doesn’t seem like that long ago that I was fretting and stressing over my April Blog Hop card and here we are for May’s episode!
This month’s challenge was to use felt. Here’s the challenge in Nichole’s words:
“This month’s blog hop is all about fabulous felt! We know you love this new addition to our product line-up and we would love to see what you are doing with it! From borders to focal points, paper crafts to sewing projects. Hair accessories to home decor accents. Cards to scrapbook layouts. We want to see it all!”
I had a beaming smile on my face when I saw this challenge! For one, PTI’s felt is amazing. I’ve never used felt until PI brought it out and I fell head over heels for it! It really is of the highest quality and I love adding something tactile to my creations! And my second reason – unlike April’s card I pretty much knew what I wanted to do for this challenge! In fact I actually finished my card several days early – definitely not the norm for me where the Blog Hop is concerned!
I knew I wanted to create a felt flower to adorn my card. But what kind of felt flower? There are plenty of ideas out there but my mind remembered a card that the uber-talented Dawn McVey made that was featured in the March issue of CARDS. The card is the last one shown in this post for those of you who are interested!
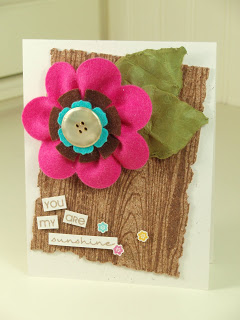
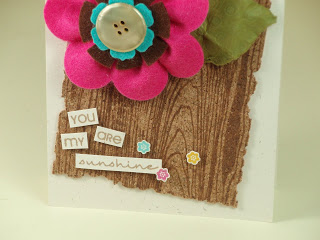
I liked the idea of a big layered felt flower so took my lead from there. I didn’t want my flower to be exactly the same, and I didn’t want to CASE the card (you know me and CASEing!). Here’s what I came up with:
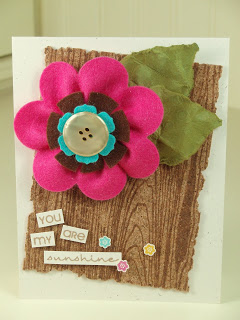
I am so in love with how this card turned out!! So bright and cheery, and so much fun!
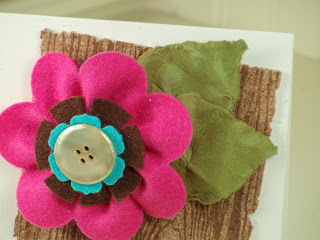
It all started with the felt flower. Using the large scallop die I cut a strip of Raspberry Fizz felt the same length as the die. I then took the felt and trimmed the width using my paper trimmer – the felt cuts like buttah!
After doing this I took some embroidery floss and did a simple hand sewn running stitch across the straight edge of the felt. When I got to the end I pulled the thread to create the ruffled, natural flower shape. I cut off one or two of the scallops that didn’t fit with the shape of the flower before using some more embroidery floss to stitch the edges together with small, tight stitches, knotting at the back.
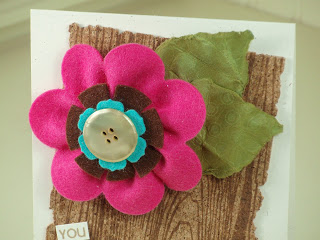
I then die cut a circle of Dark Chocolate felt using one of my circle Nestabilities then cut chunks out of it. Next came a flower cut from Hawaiian Shores felt using the smallest of the Beautiful Blooms #1 dies. I adhered a big Lemon Tart button to the flower before adhering the flower to the Dark Chocolate layer, then adhered the layered flower to the Raspberry Fizz bloom. I use Pinflair Glue Gel to adhere my felt, big surprise!
I took a while before deciding how I wanted the actual card to be composed but it all fell into place perfectly! I knew I wanted to use Background Basics: Woodgrain on my card, mainly because I’m using it on everything right now! I decided to do something different with it this time though.
I recently purchased some cork sheets from MFT and decided it would be fun to stamp a woodgrain pattern on it! I stamped the pattern using Hero Arts Latte ink (gasp, shock horror, I know – not a PTI ink!!). I pre-cut the cork before stamping, then after the pattern had been stamped I broke little bits off by hand to give a more distressed finish. I did use my edge distresser a little too for the smaller ‘nibbles’. I then adhered at an angle to a Rustic Cream card base using Pinflair.
I tore some leaves from some Ripe Avocado cardstock and crumpled them up before adhering in place with Pinflair. I did actually stamp the leaves with the polka dot pattern from the Round & Round Anniversary set with Spring Moss ink which you might be able to just make out on one of the leaves (left one of them plain). I then adhered the felt flower on top.
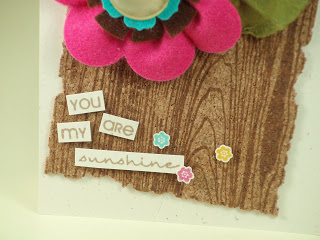
I stamped the sentiment from Fillable Frames #3 a couple of times onto Rustic Cream cardstock using Hero Arts Latte ink, then cut out each word individually. I wanted to create a sort of noticeboard feel given that I’d used the cork. I adhered each word using Pinflair.
I then decided to finish with some final little flower embellishments so stamped one of the single flowers from Background Basics: Botanicals using Raspberry Fizz, Hawaiian Shores and Summer Sunrise inks, before cutting out carefully and adhering at slightly different heights using Pinflair. They’re kind of like the little pin heads on my noticeboard, how cute are they?!
So there you have it! I had so much fun making this project and I would *love* to hear what you think of it! Thank you for stopping by, and for leaving some love if you’ve chosen to do so – and enjoy the rest of the hop!!


Gorgeous! Love the colors and the felt flowers… the BG piece is awesome. :o)
Thank you for the sweet comment! If you ever get some free time I have weekly challenges for great prizes! offthewallcraftiness.blogspot.com
This is an AWESOME card!
Oooh, I love that fabby flower–great colors! That woodgrain bg is fab, too!
What a lovely card!
I really love the way you did the flower and it looks great against that woodgrain background :).
Very lovely- T! I know you love that woodgrain, don't ya? I might have to look into that one.
Taheerah, I love this! What a fun flower!
Your card is so lovely. It is cheery, if I were the recipient of this card it would definately bring a smile to my face. Fabulous.
Lovely card! Your flower is so pretty and full.
Your flower is super cute and I love the juxtaposition against the woodgrain!
Wow! That's an amazing card. Your flower is fabulous, and the woodgrain cork is the perfect backdrop for it
Very pretty and very different. I like the ruffled scallop for the flower. Great job!
Simply gorgeous, Taheerah!
Great idea. Love how this turned out.
Fantastic! Love how the cork and felt add such interesting textures to the project.
One word….. WOW!